Prerequisites
- You’re using macOS.
- You have keycloak instance running on your machine.
- I’ll use chrome for this tutorial.
Problems
The problem is we need to serve from two ports, the first one is the keycloak admin instance (Keycloak Dashboard), and the second one is the client which uses the keycloak service. we need to serve them via the secure protocol https.
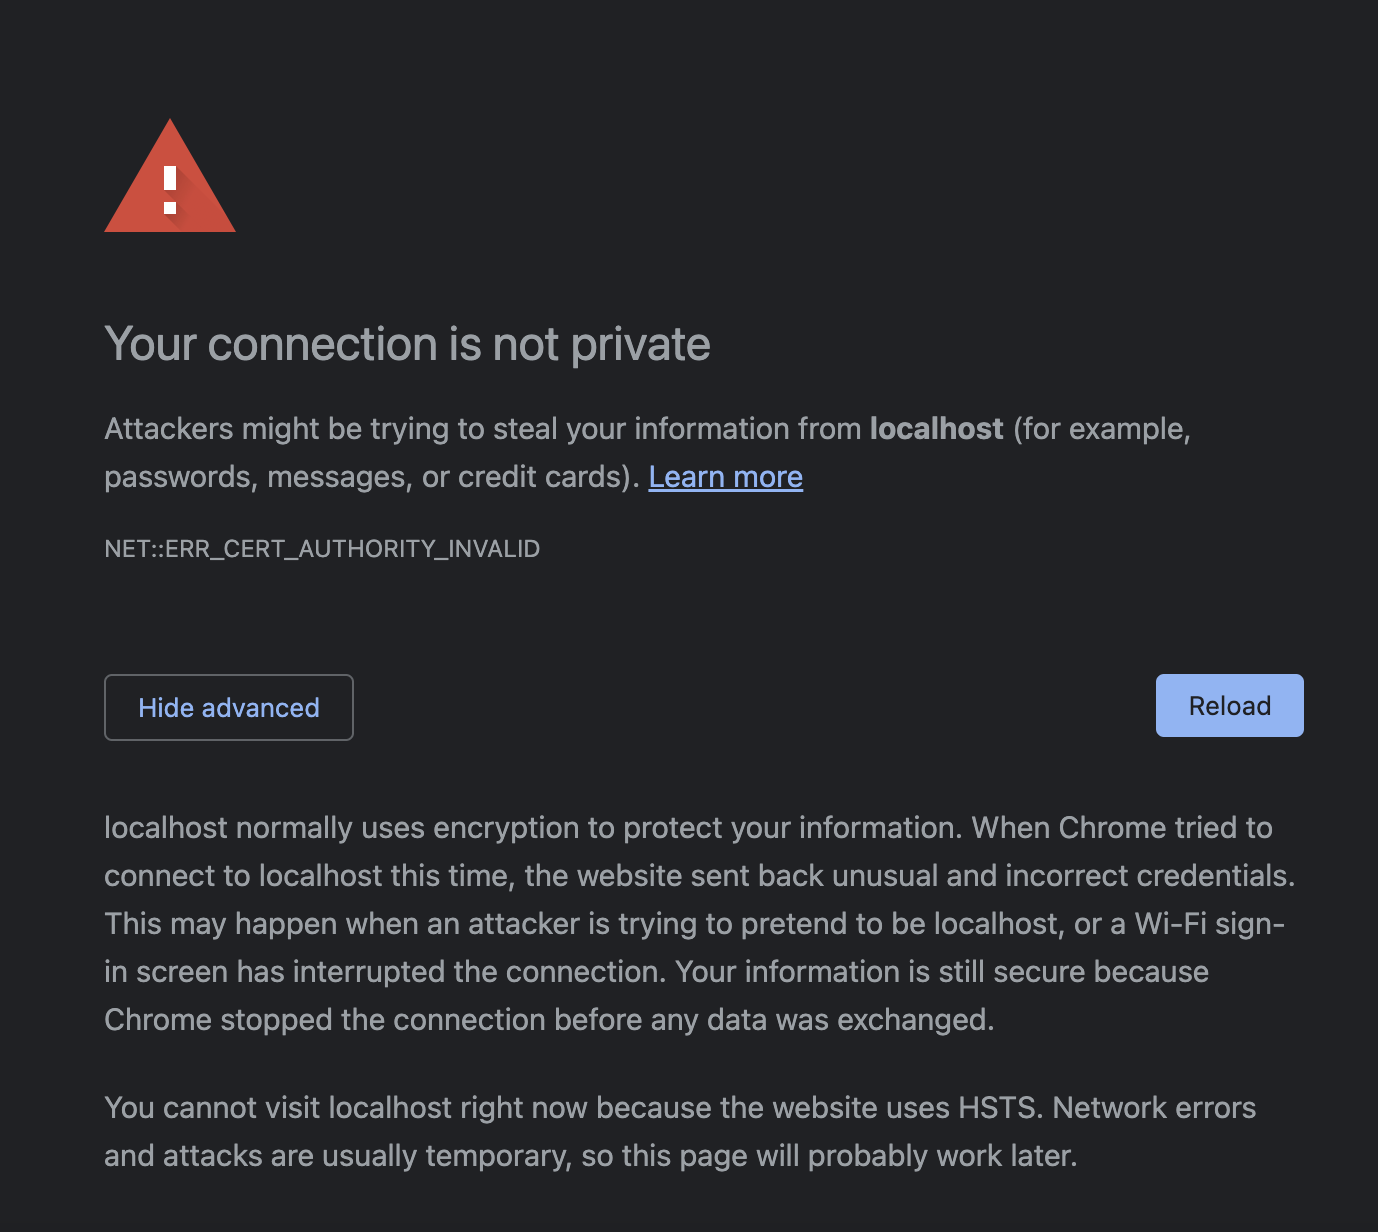
Your connection is not private
So when we try to use https on localhost, we’ll face your connection is not private error, because we’re serving localhost via https
To Solve this error All you have to do is write chrome://flags in the chrome url, and then search for Allow invalid certificates for resources loaded from localhost. to enable it.

Great! So now we can do the request to localhost with an invalid certificate.
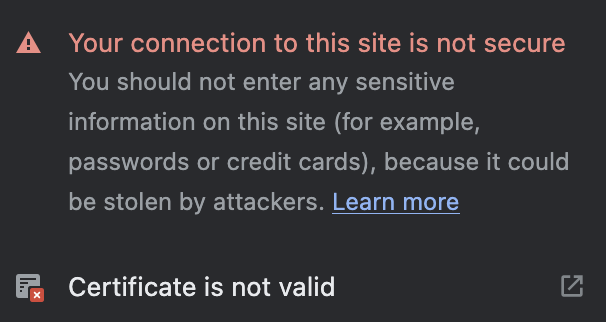
Certificate is not valid
Now we’re facing this error

When you click over it, you’ll see that the certificate is not valid, in the next steps we’ll trust this certificate
To solve this issue, we need to trust the certificate on our machine, to do this
- Click on Certificate is not valid button.
- You’ll see a Certificate Viewer popup, Click on the details tab.
- Click on Export and select PKCS #7, single certificate.
- Open Keychain Access app on your macOS and select Login.
- File > Import Items > select the file/certificate you’ve exported from chrome.
- Click on the certificate > Trust > Always Trust.
Great! Now we passed the localhost issue for the client.
The last step is creating a new certificate for keycloak instance, and trust it on our machine.
Keycloak certificate
To create a new certificate on macOS, copy this command and put it on your terminal
 openssl req -x509 -out localhost.crt -keyout localhost.key \
  -newkey rsa:2048 -nodes -sha256 \
  -subj '/CN=localhost' -extensions EXT -config <( \
   printf "[dn]\nCN=localhost\n[req]\ndistinguished_name = dn\n[EXT]\nsubjectAltName=DNS:localhost\nkeyUsage=digitalSignature\nextendedKeyUsage=serverAuth")
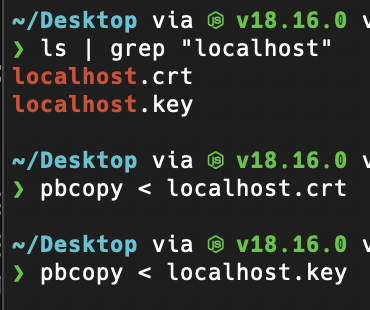
This will create two files for you, the first one is localhost.crt the certificate itself, and the second one is the localhost key, we’ll use both in the keycloak folder configuration so you can copy them.
You can use them via a keycloak/certs folder.
- localhost.crt -> keycloak-server.pem
- localhost.key -> keycloak-server-key.pem
You can also use this command
bin/kc.[sh|bat] start --https-certificate-file=/path/to/certfile.pem --https-certificate-key-file=/path/to/keyfile.pemResources
Have you learned something new? Want to learn more?